
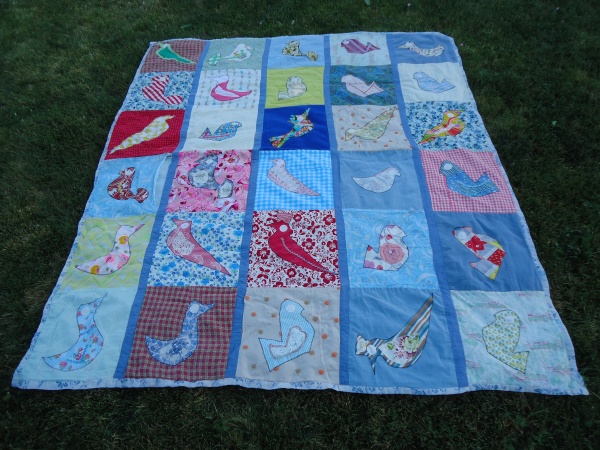
The entire quilt was a bit of doozy…30 of 30 blocks needing help.
For insight on how I fixed blocks with ruined backgrounds, see HERE.
Today I am sharing one way to fix a damaged applique. I am not pretending this is a great way, but this block needed two different techniques. So it seemed a good example.
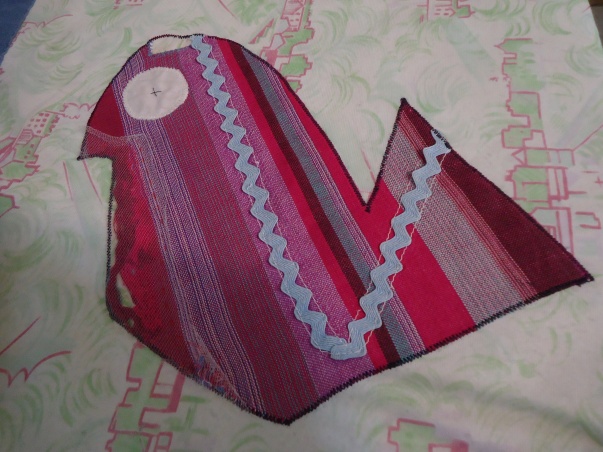
A previous repair had stitched netting over the damaged fabric. I suspect much of the damage on this block, and a number of other places on the quilt, was due to a combination of different shrinkage after washing and very light quilting.

So I removed the netting and cleaned up the frayed fabric so I could see what was going on.


The small frayed area at the bottom could be sort of darned using matching threads. the larger torn area needed matching fabric.

I stitched the bottom area first (no good picture, sorry) and then a line on the matching fabric right where the stripe color changed. Fortunately, not in the way of the eye.

You can see the darning repair in this picture. Once I attached the matching fabric I pressed it open and trimmed it just outside the zigzag edge. Then I turned in under and stitched it down like turned edge applique.

And finished it off with a matching zig-zag stitch as close to the original as I could. Whew! From a distance and on a galloping horse, it doesn’t look too bad.


Great job! That choice of fabric was perfect – it looks like it was in there from the beginning.
Wow. Great job.
I could never do what you’re doing. All I can say is wow.
You are doing a marvelous job! The fabric is a perfect match. Thanks for keeping us in the loop.
Nice job! Thanks for sharing how you fixed this quilt. I enjoy all of your posts. God bless you!
From around 1500 miles away, it looks REALLY good! You are so clever!
I have to give you a big shout out for doing these repairs. I wouldn’t have the patience. I’m sure the lady who wanted this quilt repaired will be very appreciative (or she should be).
this is too late for this quilt but my friend had me use netting on some blocks over the front to stabilize and hold multiple loose bits down …