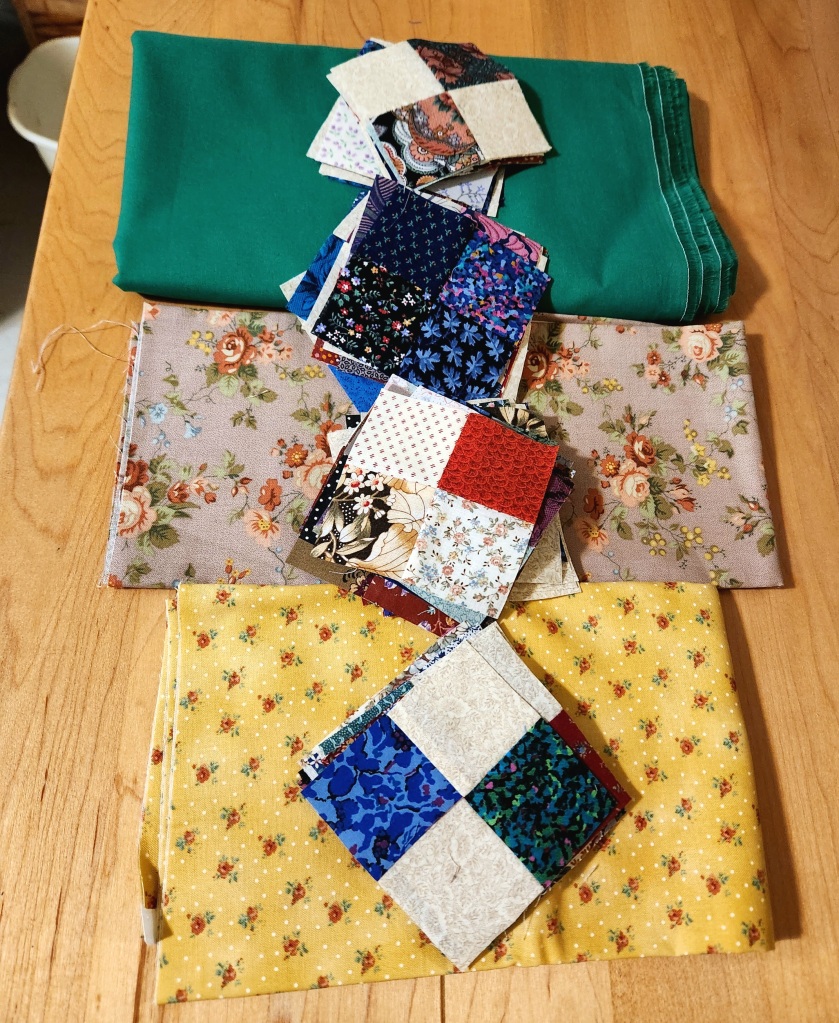
Friend Cheri shares her leftovers with me from time to time. It is always exciting to get a new bag of possibilities.
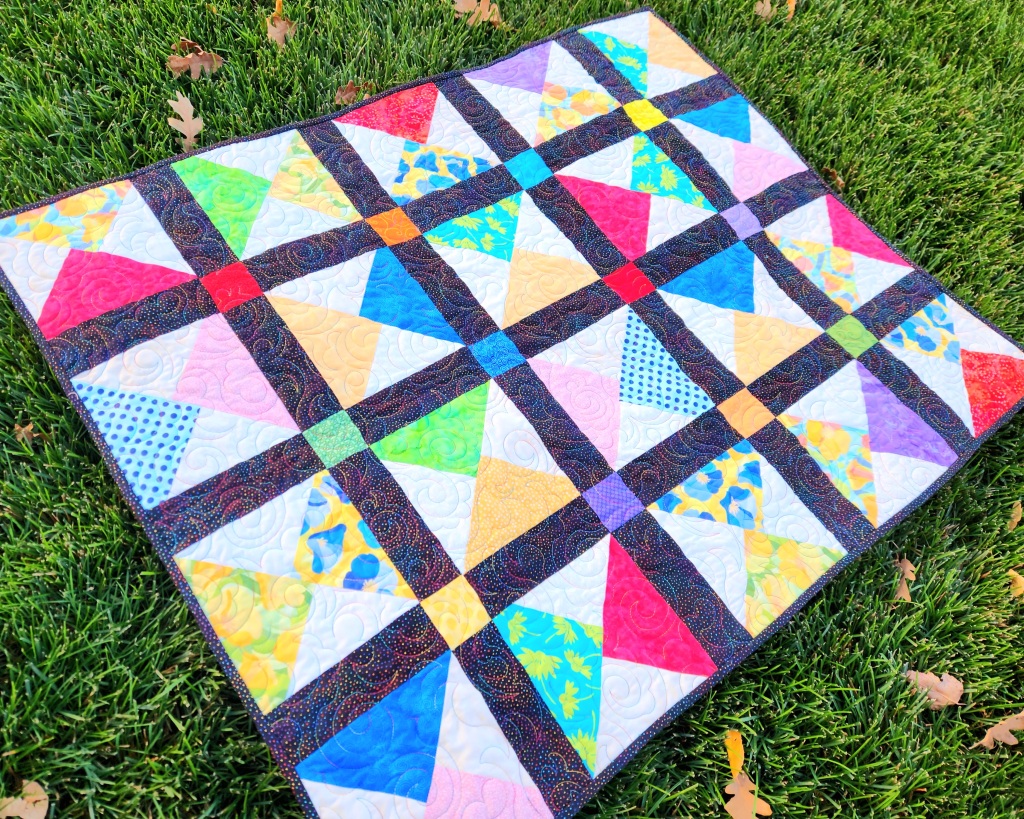
Sort and straighten and ask, “What do you want to be?”
Somehow, I was seeing stars. And that gave me a place to start.
I added a few fabric scraps from stash and adjusted as I went along. I don’t know how I would write a pattern, or even a tutorial for something like this. It is an interesting process, though. A discovery every step of the way.
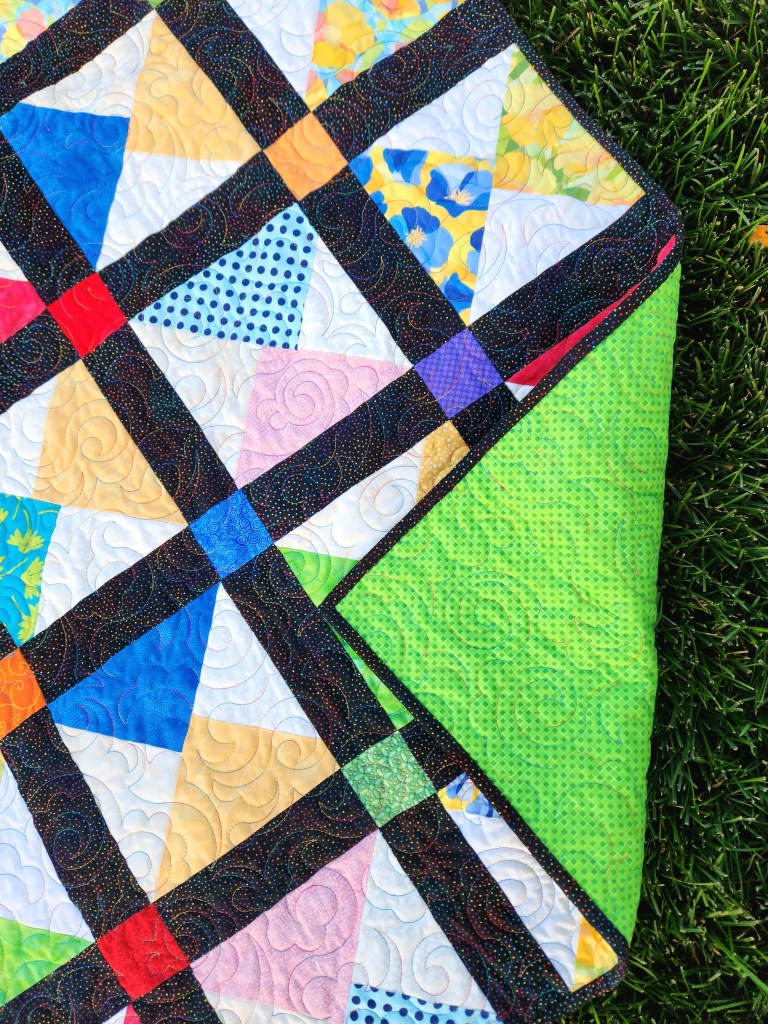
And the, Ta-dah! A quilt!
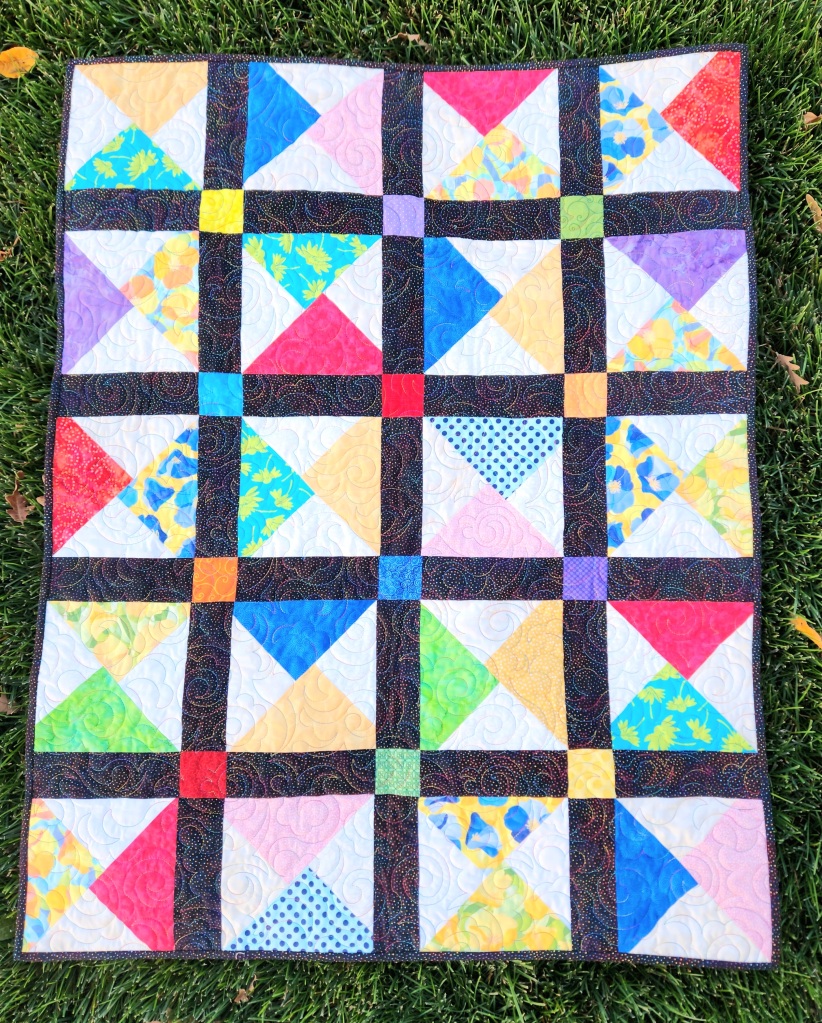
Finished size is 33″ x 38″. It has been gifted to a co-worked expecting a baby girl soon.
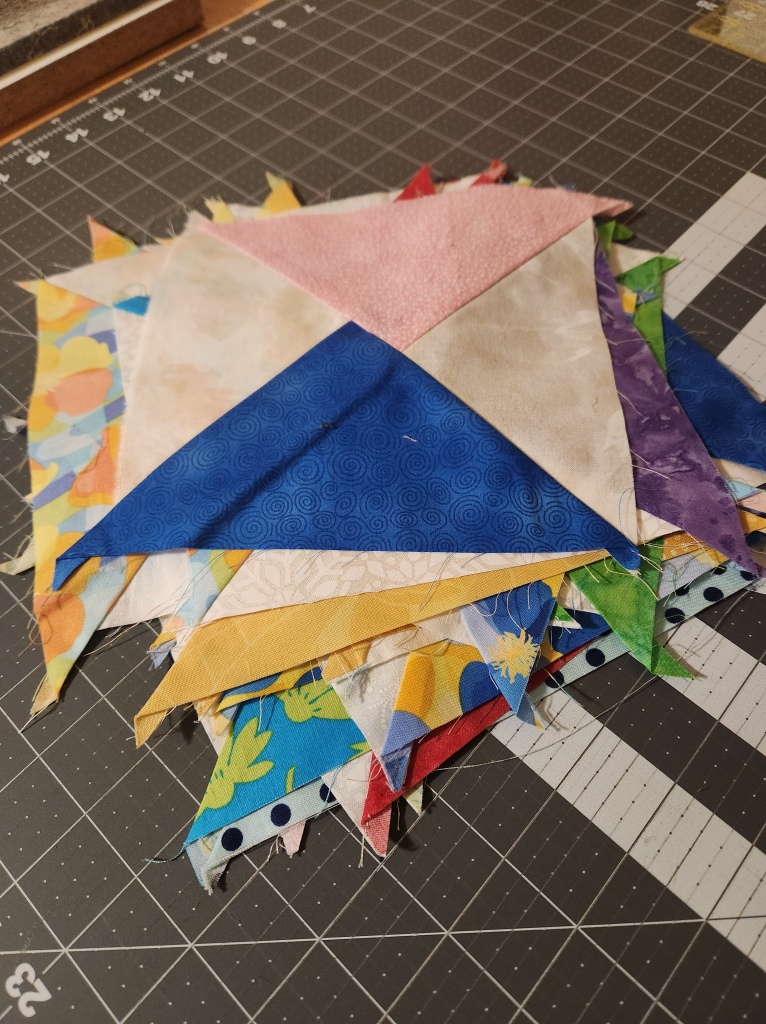
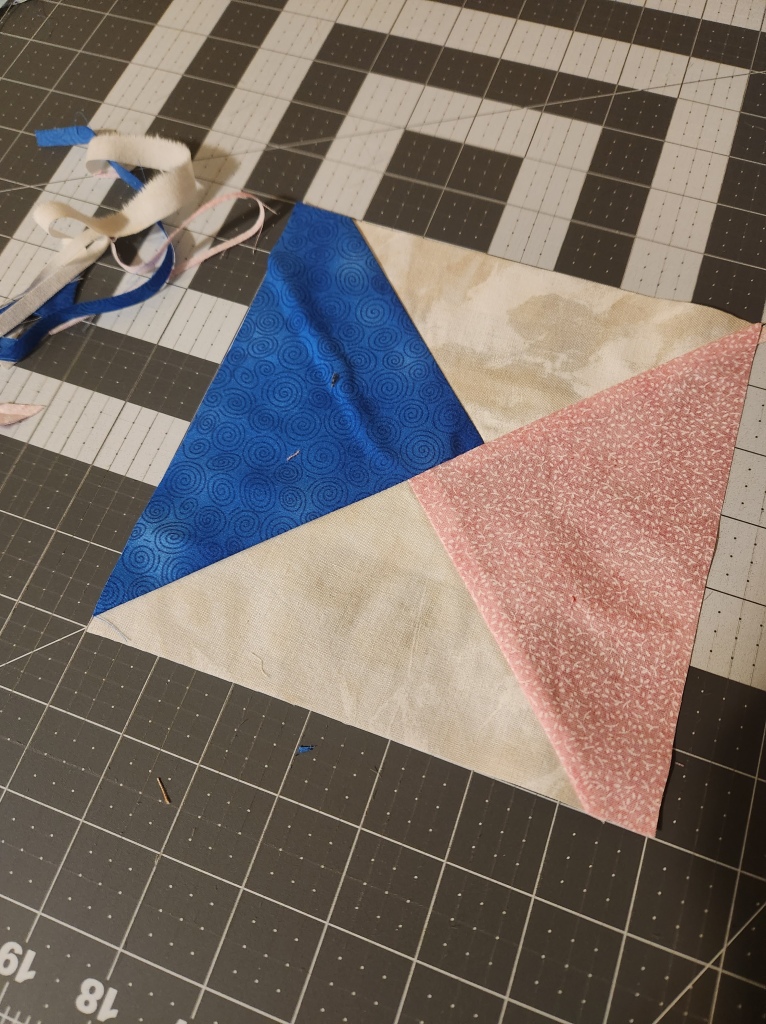
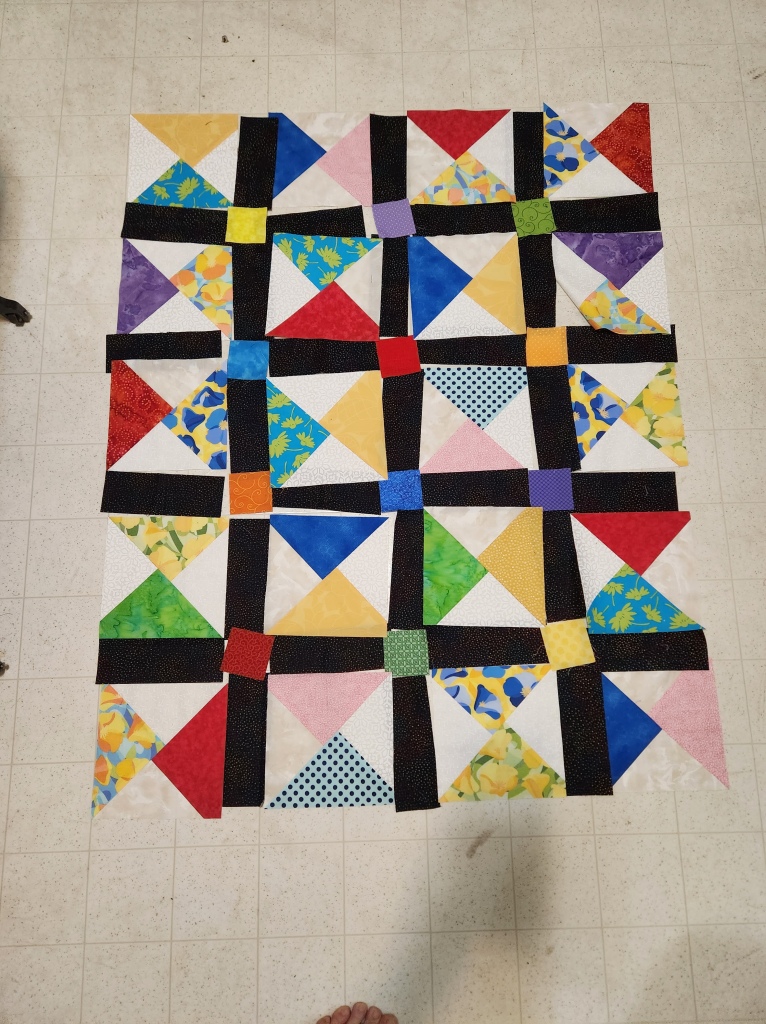
You know by now how these things get started: someone gives me something. In this case, as part of a larger bundle of possibilities, there were three matching 6-1/2″ applique hearts. Much too cute to trash. I did consider pot holders, or a table runner, or a banner. But what they wanted to be was a baby quilt.
I had a little bundle of fat eights that “happened” to match perfectly. I love it when that happens. All that was needed was some background fabric and something to make centers for 6-1/2″ star blocks. I really wanted to make the centers as 4-patches using the bundle fabric, but there just wasn’t enough.
The strips of fabric are cut at 2″. Four of them create a 6-1/2″ block of color. This would have been much easier with straight cut quarter yards, but with enough fabric-stretching, the fat eights just made it.
There is a small background piece between (1″ finished), 3″ and a border around.
It is such a cheerful quilt, bringing joy to the heart. And it all started with just a few hearts!
I really like hand-me-down projects. They introduce an element of mystery and challenge my skills and assumptions.
The bag held a pile of friendship stars. Some had names written on the seam allowance, leading me to believe they were part of a long-ago block exchange. Some spin one way, and some another. Maybe that is what held the original maker back?
They finish at 6″ square, so, to make something of a usable size, something would need to be added. Sashing is an easy go-to. But, what color? Not white. Not cream. Not black. None of them worked. Oddly, as I dug through my stash of solids, this dark green stood out. Interesting, but not overwhelming.
The quilt is still small (34″ square), but there is a baby out there somewhere that will be warmed because the work of many hands is finally a finished quilt.
ps–Looking at it now, I think I would extend the sashing around the outside, still keeping the binding the same color. More balance. And a few more inches.
There were 21 blocks in the bag. The construction technique is one I am not familiar with, so making more wasn’t really an option, but 20 blocks was enough to make a baby quilt.
A quick trim squared them up to 7″.
The blocks are interesting, but not enough on their own. What was needed was sashing, something dramatic, to complete them.
I settled on 2-1/2″ sashing with coordinating colors in the cornerstones.
And matching binding.
Look around your sewing space and see if you have a bag of possibilities. Sashing might be just the thing you need to help you succeed in a little destashing.
There were around 200 4-patch blocks, most alternating background/print, and some, what I would call, mixed patches. All came together in a box.
They had issues–mostly inconsistent seam allowance. And some people might have considered them dated.
But there was something interesting about them. So, first things first–Square Up. I chose 3-1/2″.
Alone they weren’t enough to make a sizable quilt, so I explored a number of different options for the alternating squares–too light, too dark, too dull, too print-y. None were quite right. Then, I remembered, when struggling with colors, there are a few that are almost always the right answer. They brighten, connect, and go with nearly everything. GOLD is one of them.
(PS–a good solid aqua/turquoise is another, but we’ll cover that another day).
Right away things started to look better. The layout I settled on was to set the blocks on point with the light/background squares always facing the same direction. This gives a sort of waterfall effect, creating stability and movement at the same time. The mixed patches are scattered throughout for extra interest.
The final top is approximately 59″ x 76″ and has a warm, welcoming feel. Much like fall.
MINI TUTORIAL (in case you want to make something similar from scratch:
MATERIALS:
2″ scrappy squares–around 800
background fabric–2-1/2 yards
binding–1/2 yard
backing–3-1/2 yards
DIRECTIONS:
Create 192 4-patch blocks. They should measure 3-1/2″ square
Cut the background fabric as follows: 165 3-1/2″ squares (alternating blocks), 13 5-1/2″ squares cut twice on diagonal (84 side setting triangles), 2 3″ squares cut once on diagonal (4 corner triangles), 7 3-1/2″ strips width of fabric (for border).
Lay out the 4-patches on point in a pleasing arrangement 12 blocks wide and 16 blocks high.
Add the 3-1/2″ background blocks, setting triangles and corner triangles.
Assemble into strips along the diagonal lines, then join the strips together.
Should measure approximately 53-1/2″ x 69-1/2″.
Join the 3-1/2″ strips of background fabric together. Cut into two strips 3-1/2″ x 53-1/2″. Add these to the top and bottom of the quilt body. Cut the remaining into two strips 3-1/2″ x 76-1/2″. Add these to the left and right of the quilt body.
Ta-dah! a quilt top!
Layer, quilt and bind as you like.
This is very much a MINI-tutorial. I am happy to answer any questions you may have.
This project originally appears in the Online Quilt Magazine, a great resource for your quilting needs.
It started as a block. A LARGE block–25″. It was beautiful, and someone worked very hard on it. And abandoned it. And it was lonely.
What to do…
Well, I also “happened” to have (if you believe in coincidence) these leftovers someone shared with me. The colors worked. The strips weren’t very big and about 3/4″ across, finished. I cut them into 2″ wide sections and pieced those together.
Also, found this lovely yellow in my stash with just the right print on it. I love being lucky, don’t you?!
Around and around until there were 4 2″ (cut, 1-1/2″ finished) borders and it was about 37″ square.
This piece deserved more than just edge-to-edge quilting. So I gave it to Jennifer (everyone needs a longarm genius for a buddy) and she did her magic.
There were pencil marks from the original maker that started the quilting idea.
We selected thicker polyester batting to provide enough lift to really make the quilting POP!
And the finish is a treasure. Shout hooray–another quilt given a second chance!
NOTE: This post first appeared in Online Quilt Magazine. If you haven’t subscribed yet today is the day to do it.
I recently saw a curtain rod quilt hanger on someone’s blog (probably yours…feel free to remind me and I will add the link).
It was exactly what I wanted. (NOTE: The quilt shown is a new Second Chances Quilt that will be published soon. )
Good husband was glad to help (or said he was) and now I have a lovely addition on the wall above Machine #2 (belonged to my maternal great grandmother). YAY ME!
Here are the links to what I purchased. Not an affiliate, but in case you want a lead: ROD and CLIPS.
I enjoy thrift stores for many reasons, but, while I always check the fabric section, I rarely find anything that suits me.
But today…
WOW! I am so pleased: 14-1/2 yards for $1.60/yard.
Can’t beat that. I see a quilt kit, backs for a twin donation quilt and three baby quilts, and red dots (because a person can always use red dots). YAY!
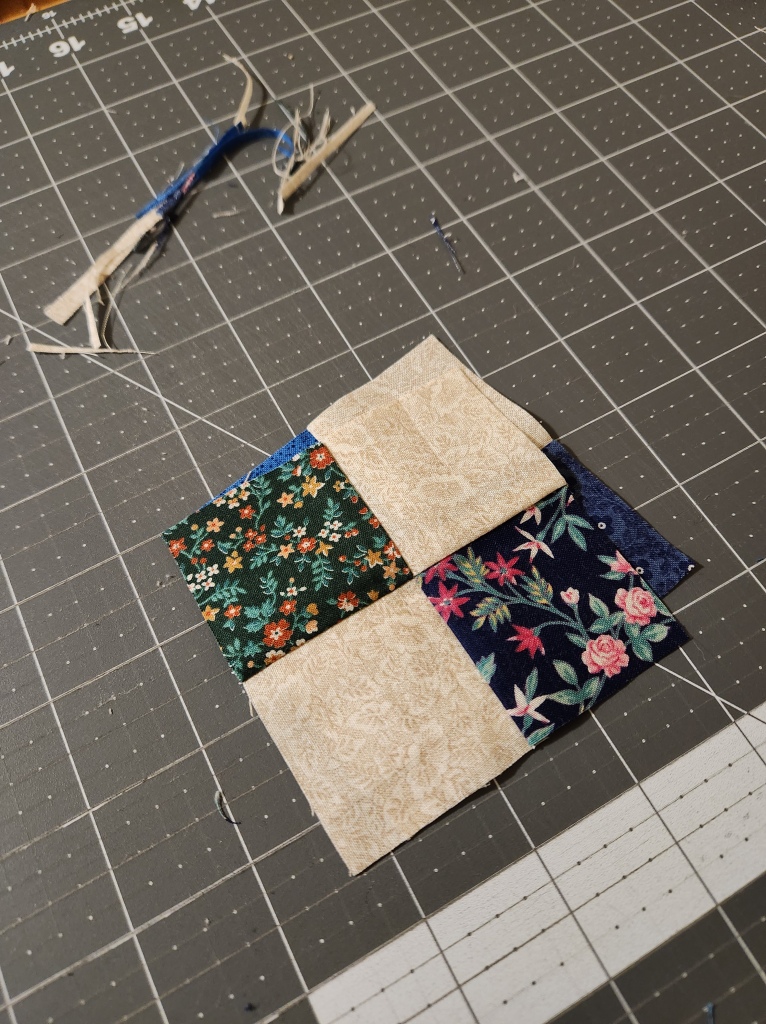
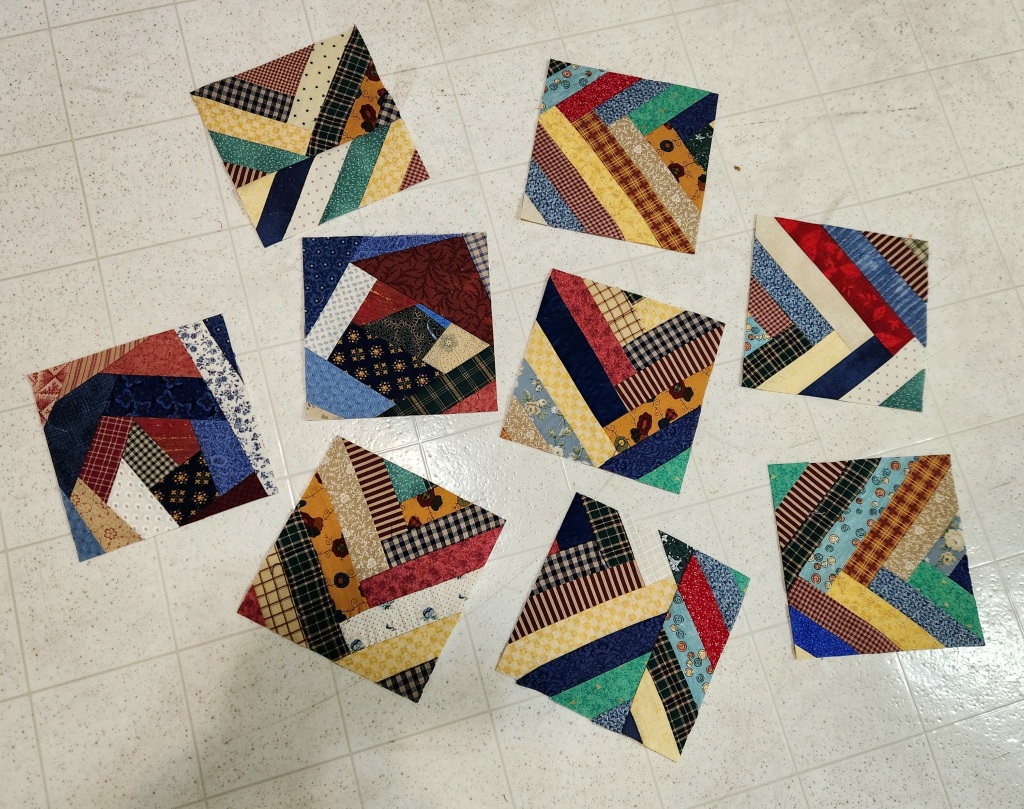
What if you have a pile of color-coordinated bits and pieces, but they aren’t the same? Can you combine blocks, crumbs and braids? Well, you can try.
I used the existing crumb blocks as a starting point. They measure 6-1/2″. Cutting, turning and trimming the braids yielded enough parts to create seven more blocks. For a baby quilt, 9 blocks is enough. NOTE: You could create this same pattern using any 6-1/2″ blocks you might have laying around.
NOTE: These blocks have a lot of bias edges. Consider starch to stabilize.
Add a border around each block. I used 2 background strips 1-1/2″x 6-1/2″ and 2 strips 1-1/2″ x 8-1/2″ for each block. Total of 18 each.
Then, a second, dark border (NOTE: I used matching fabric for the binding): 2 strips 1-1/2″x 8-1/2″ and 2 strips 1-1/2″ x 10-1/2″ for each block. Total of 18 each.
Now, for sashing–Cut 10 strips 1-1/2″x 10-1/2″ and 4 squares 1-1/2″ x 1-1/2″.
Follow with borders: 2 strips 3-1/2″x 32-1/2″ and 2 strips 3-1/2″ x 36-1/2″.
You will need backing WOF x 1-1/8 yards
Just as a note, you will need 3/4 yards of the background fabric and 5/8 yard of the darker fabric for the second sashing and binding.
Don’t neglect those bits and pieces, or a small pile of blocks you have on hand. They can quickly become a quilt needed for an upcoming occasion, or just because. Enjoy!
Possibly it was always this way, but it seems that the rise of pre-cuts has led to certain sizes being used more often in piecing quilts.
Because of that, sometimes you can take leftovers from different projects and find that they can play surprisingly well, like little kids who just met on a playground.
Just start trying to match things up and see what happens.
Well, there you go!
It doesn’t take long to finish when the pieces have a common denominator, in this case 2-1/2″ squares.
This post also featured in the Online Quilt Magazine. Check it out. Such a great value.
NOTE:
1. The small colored squares are cut at 2-1/2″.
2. Each block finished at 14″ square.
2. The straight set blocks use 16 2-1/2″ squares and background pieces measuring 2 3-1/2″ x 8″ and 2 3-1/2″ x 14-1/2″.
4. The onpoint blocks use 25 2-1/2″ squares and background pieces made from 2 squares measuring 7-1/4″ and cut once on the diagonal.
I am making these measurements mathematically as I no longer have the quilt. It was gifted to our school librarian.
You could make the same design from scratch with those mini-charms or charm packs just looking for a purpose.