
While fat quarters are justifiably popular, this baby quilt takes a straight cut quarter yard and creates a quilt around it.
QUARTER TURN BABY QUILT

37 or 38″ x 40-1/2″
MATERIALS
1/4 yard straight cut Width Of Fabric (WOF)
8 assorted coordinating 2-1/2″ WOF strips
16 assorted coordinating 5″ squares
1/2 yard background fabric
1 yard backing fabric (or as required for quilting technique)
batting suitable
1/3 yard binding fabric
CUTTING DIRECTIONS
1. Take a good look at your 1/4 yard cut. Mine was probably end of bolt and not square cut. So I had to trim a little off. Do what you must but leave it as wide as possible. Mine ended up 8-1/4″. That is why I show a variable finished size for the quilt. Just leave all you can.
2. From the background fabric cut 16 5″ squares.
3. From the background fabric cut 4 1-1/2″ strips WOF.
4. Cut ALL WOF strips to 40-1/2″ wide. This includes the quarter yard, 8 2-1/2″ strips, 4 1-1/2″ strips.
CONSTRUCTION
1. Create the pinwheel blocks. I used a quick technique that I first found HERE. Lay a background and a colored square face to face and stitch all the way around.

Then cut them diagonally twice.

Iron open and lay out in a pinwheel shape and stitch the block together.
WARNING: This technique is quick and effective but results in all the outer seams being BIAS. Starch helps. Very gentle handling also helps. While there are other ways of creating these pinwheel blocks, you might want to try this one if it is new to you. She doesn’t trim the “ears” off the edge. I am not sure why because it adds so much bulk. Take a minute and do that.
These should be 5-1/2″ square.
2. Arrange the pinwheel blocks (all 16 of them) into two rows of 8 each and assemble.
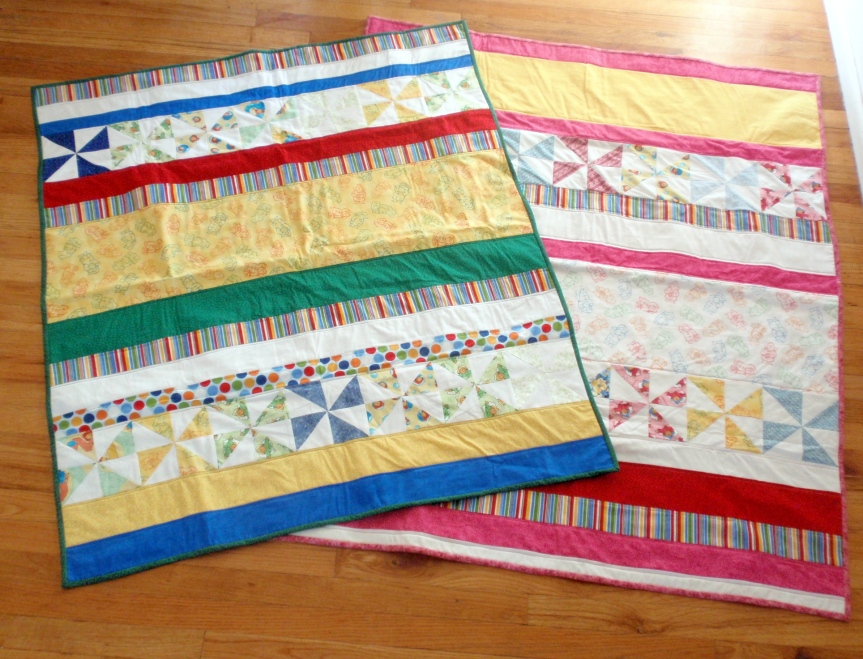
3. Lay out the entire top following the guide picture below. You have 2-1/2″ colored strips, 1-1/2″ background strips, two pinwheel rows and the original quarter yard.

4. Sew it all together.

5. Quilt and bind as desired.

6. Ta-dah! A quarter yard has turned into a quilt!
I can see myself making more of these. It is quick, satisfying and can use a lot of those “good” pieces I have had sitting around waiting for the right idea to come along. This quilt is part of our 52 in 2015 project. Instead of fabric waiting for an idea, it is now a quilt waiting for a baby. I call that an improvement!
Quarter Turn Gallery


…Your beautiful creation featured here!

It is a great way to make pin wheels.
Wow did’t you just post that strip? Wow you are amazing! Great talent that you have
The quilt goes together quickly. Once the pinwheels are made you just sew it together and you have a top. There are only, I think, 15 pieces…
Really cute, and pretty easy. I like the pinwheels you used, too. Thanks for the idea.
Don’t you just love quick quilts. I do. I learned the same technique from her also. Love her short cuts. Love the cheeriness of that quilt.
BrilliantII Like the way you do pinwheels; new to me. Must add to todo list. Thanks, once again,
That turned out B E A U T I F U L!!!
I love the colors and the pinwheel blocks! Once the pinwheel blocks are sewn together in a strip, I think each strip could be “quilted as you go”. That might make it go together even quicker! I love your work 🙂
I love the pinweels with the stripes.
I am very impressed with what you did with what you had; it is very pretty, and definitely a keeper. I will enjoy making this!