
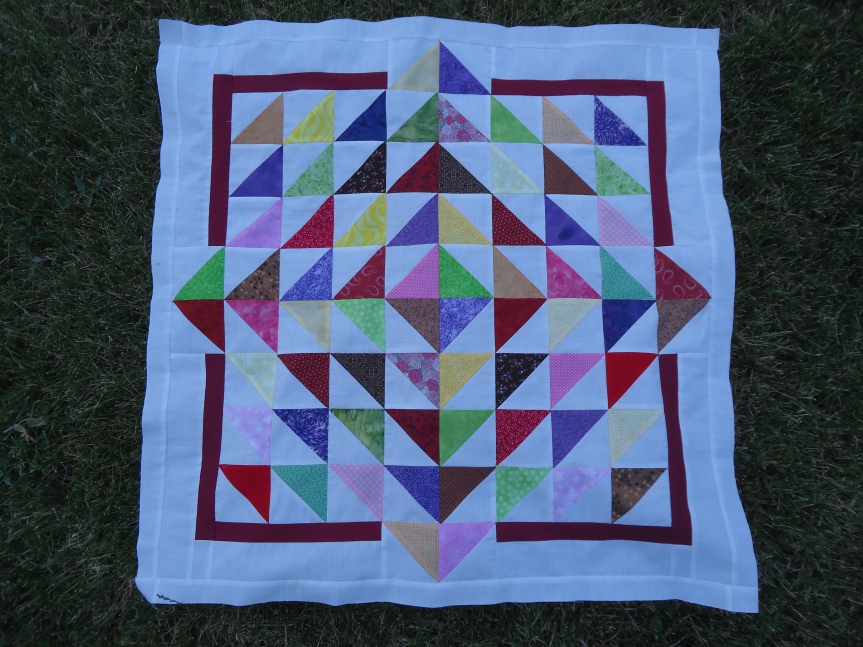
This happy little quilt is based on the Fresh Flowers quilt by Karen. (You can see the original here: http://piecesofcontentment.blogspot.com.au/2011/02/fresh-flowers-quilt.html ) She kindly gave permission for me to resize it and write a tutorial for the design. I just love the happy shape. Hers uses a charm pack (5″ squares), a great alternative. This one is based on 4″ squares.
LILY PAD
Finished size: 32-1/2″ 32-1/2″
MATERIALS

36 4″ squares. Use scraps to give variety. On this one I used 6 different fabrics in the six colors chosen to match the backing fabric. I like doing that with baby quilts.
1/3 yard for the outer “strip” and binding (not shown in picture above)
1 yard background fabric
1-1/8 yard backing fabric (or as required for quilting technique)
batting suitable
CUTTING DIRECTIONS
- Prepare your colored squares. 36 of them.
- Background fabric:
- 36 4″ squares
- 4 2-1/2″x 9-1/2″ strips
- 4 1-1/2″ x 2-1/2″ strips
- 4 2-1/2″ x 12-1/2″ strips
- 2 1-1/2″ x 30-1/2″ strips
- 2 1-1/2″ x 32-1/2″ strips
- Colored Strip:
- 4 1-1/2″x9-1/2″ strips
- 4 1-1/2″x10-1/2″ strips
- 4 2-1/4″xWOF for binding
CONSTRUCTION
- Pair the colored squares with background squares. Draw a diagonal line across the back of the background square. Stitch 1/4″ away from the line on each side. Cut and iron open to create two half-square triangles. Do this 36 times. It will create 72 half-square triangle blocks.

2. Square up the half-square triangles to 3-1/2″ inches. Yes, this does matter.

3. Lay it out in a pleasing arrangement. You will notice that it is an arrangement of 8 by 8, plus 8 more in triangles outside the array.
4. Stitch the rows together. I created strips and then sewed the strips together, nesting the seams for accurate piecing and to minimize bulk.

5. Now you are going to create the first set of borders. Sew the 1-1/2″x9-1/2″ colored strips to the 2-1/2″x9-1/2″ background strips. Do this four times.

6. Make a long border that uses a strip-background pair, two half square triangles in a pyramid shape, and a second strip-background pair. Make sure the colored strip is on the side that is at the base of the pyramid as shown below. To this two times.

7. Attach the borders to the top and bottom of the quilt.

8. Now, you are going to create the borders for the other two sides. The technique is similar, but there are extra pieces. First, attach the 1-1/2″x2-1/2″ background pieces to the 1-1/2″x10-1/2″ colored strip. Do this four times.
NOTE: I thought for sure that I had pictures of each step. I guess I was caught up in the creative process. I’ll have to make another one sometime soon and do better on photography.
9. Stitch the pieced strip to the 2-1/2″x12-1/2″ background strips. Double check first to make sure the small background piece will end up on the outer end of the larger pieced unit and on the base of the triangle. Yep, I had to use my seam ripper here when I didn’t double check. 🙂 Do this four times.
10. Again, Make a long border that uses a background-strip-background pair, two half square triangles in a pyramid shape, and a second background-strip-background pair. Make sure the colored strip is on the side that is at the base of the pyramid. Do this two times.
11. Attach the borders to the sides of the quilt. The colored strips should meet, giving a continuous look to the corners of the colored border.
12. Attach the 1-1/2″x30-1/2″ background strips to the top and bottom of the quilt.
13. Attach the 1-1/2″x32-1/2″ background strips to the sides of the quilt.
14. Ta-dah! You have a finished quilt top.

LILY PAD GALLERY
This is the first Lily Pad quilt I made, for a family in my neighborhood.

Your beautiful creations shared here…

I like this very much. Thanks for the pattern. Nice job.
That’s a great looking baby quilt! I have one to make for someone in my ward, and I might try this one. It would work as a leader-ender. Your link to the original quilt didn’t work.
I really like this pattern and what you have done with it. This will be one that I will try. I love the colors. Does it make out to around 32″. Also your link to Fresh Flowers doesn’t seem to connect to anything.Thanks for sharing the tutorial 😄
Wonderful pattern…simple, yet striking! Thank you for sharing.
Your quilt looks beautiful Deanna! Thank you for taking the time to write this tutorial, I’m sure it will be helpful for many. I notice the border construction is a little different to mine and simpler to achieve – a good choice.
This pattern is so striking! I have one almost finished (just needs to be quilted and bound) which I used leftover HST from another project, and turned out to be the perfect pattern. Thank you! Instead of the outer border being the background, I had used a filler for the inner border, which I used for the outer.
Thank you for sharing, love this quilt
I am a very new quilter. I would love to make this quilt for my queen size bed. What size do I need to cut the squares and how many blocks would I need. Thank you so much for sharing this baby quilt. I just love it.
Just finished making the quilt top. It went together fairly easily and the points pass muster, even if I DO say so myself. I used a pack of batik charms squares and batiks from my stash. Will be a baby gift. Thanks for posting the tutorial! Wish I could figure out how to post a pic… SO not a techie…