
This quilt is inspired by twins due in June. They are far away and most of their hugs will have to be carried by quilt. At least a hundred each, don’t you think?
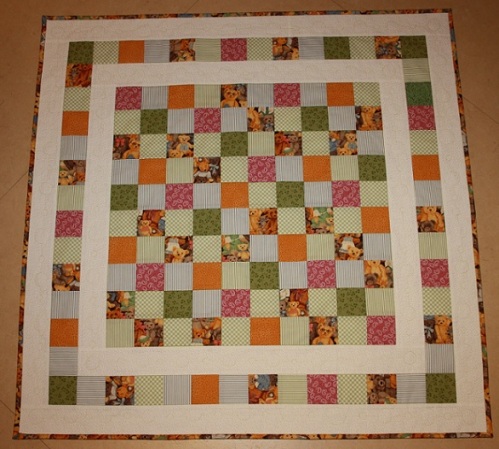
HUNDRED HUGS

36-1/2″ x 36-1/2″
MATERIALS
about 220 2-1/2″ charm squares (you will use 212 of them)
2/3 yard background fabric
1/3 yard binding
1-1/8 yard backing
batting to size
NOTE: If you do not want to use the “flip-and-trim” method to create your half-square triangles all using 2-1/2″ squares (Some people are upset by the perceived waste, and that is OK.), you can cut 2-7/8″ squares and create half-square triangles from them. In that case, you will need additional background fabric and fabric for the blocks and can reduce the number of charm squares by 56. If you have questions about this, please ask. I will be glad to help. The purpose in choosing the flip-and-trim technique was to make the quilt simple to cut and charm-square friendly.
ANOTHER NOTE: If you have an unused jelly roll that is feeling lonely, you can separate it by colorway (or not) and make three of these quilts from a single 42 strip jelly roll. I’ll bet you can find three people willing to take them. 🙂
CONSTRUCTION
1. Using your 2-1/2″ squares, build a 100 patch center (10 x 10 blocks).

2. Using your 2-1/2″ squares, build two strips that are 12 squares long and two strips that are 14 squares long.

3. Prepare your background fabric as follows: 1. Cut 8 strips 2-1/2″ by Width Of Fabric (WOF). From two of the strips, pieces 20-1/2″ long (two total). From two of the strips, pieces 24-1/2″ long. From two of the strips, pieces 32-1/2″ long. From two of the strips, pieces 36-1/2″ long. You will have a total of 8 background strips. Set these aside.
4. Using the leftover pieces from your strips, cut 56 2-1/2″ squares. These will form your half-square triangles. If you can not get all 56 pieces from the leftovers, cut another strip of background fabric.
5. Sew the 20-1/2″ strips to the sides of the hundred patch and the 24-1/2″ strips to the top and bottom of the hundred patch.

6. Sew the 12 square strips to the sides of the quilt and the 14 square strips to the top and bottom of the quilt.

7. Create your half square triangles. Using one colored square and one background square, put them right sides together and sew across the diagonal corner to corner.

Cut off the outside corner, 1/4″ from the seam.

Press open.

You have a half-square triangle exactly 2-1/2″ square.
(SIDE NOTE: You can create a second seam 1/2″ from the first, cut between them, and get your 2-1/2″ HST and a smaller one you can save for some obsessive project later. If this doesn’t make sense to you, that may be a good sign. Just use the standard direction. If it does make sense, carry on!)
Do this 56 times.
If you have trouble with your machine eating the corners of the blocks, chain piece very close together. You can also try starting the first stitch just a little bit inside the exact corner, about a stitch length. If you throat plate is very open this technique may be difficult on your machine. If anyone else has a tip or trick for this, I would love to hear it and will add it to the tutorial.
NOTE: Daphne White of Shelburne, Ontario suggests using a little piece of paper underneath so that there is no “point” to be eaten. Once you are done, the paper just tears away. Works with chain piecing. The slip of paper doesn’t have to be very big. Thank you, Daphne. It works!
8. Sew together four strips of 14 half-square triangles each. On each strip all of the triangles should be pointed “in” so there is a larger triangle where numbers 7 and 8 meet. This looks like hands or arms reaching around. Part of the Hundred Hugs idea. Use the picture to help you with placement.

9. Sew one strip to each side of the quilt. On the other strips, attach a single colored square to each end, making a total of 16 squares. Attach these strips to the top and bottom of the quilt.

10. Sew the 32-1/2″ background strips to the sides of the quilt. Sew the 36-1/2″ background strips to the top and bottom of the quilt. There you have it! One Hundred Hugs top finished.
11. Sandwich, quilt and bind as desired. I chose a simple straight line pattern that emphasises the huggy design of the quilt. Even if you have never machine quilted, you might want to give this one a try. It is small enough to manage fairly easily.

12. Ta-dah! One quilt finished. Oh, do please share pictures of yours! I love to see them.

HUNDRED HUGS GALLERY
Marta in Italy created two!

Kathy’s Version

My new one…

Sister Mary Pat made two of them…


And Kathy did this one for her husband’s coworker

And all the way in the UK…

Lauren built this cheerful version in just a few days–surprising how fast it goes when you are having fun!

Gaby chose Hundred Hugs to be her very first quilt. Didn’t she do a great job?!

Yummy made this bold and bright version.
your quilt here…

thank you for the tutorial…i am picking out my ‘baby colors’ from my cut squares and intend to make one of each for the baby pantry here in my county…they are adorable..and i will use the method of cutting 2 7/8″ squares to make the half squares for the borders….you are determined to show me how to use up all my scraps!!!! what fun…
I was looking forward to seeing these! They were definitely worth waiting for. It is really nice to see the two colours together. Mummy will be very pleased to receive them 🙂
You are absolutely NO help at all in the “trying not to start new things” category! Now I wanna do this one, too, and I haven’t even gotten my Fading Charms off the ground yet!
Love these! Thanks for the tutorial…I’ll be making some!
thanks so much for the tutorial. I can use this now.
So adorable! I like the idea of getting three from a jelly roll. Must be one around here somewhere!
Lovely quilt with such a nice thought behind them especially if the babies are far away. You asked about any tips to keep the machine from eating the corners when making half square triangles….My mentor, Daphne, suggested using a little piece of paper underneath so that there is no “point” to be eaten. Once you are done, the paper just tears away. Works with chain piecing. The slip of paper doesn’t have to be very big. Hope this helps.
Oh I love this! How awesome this will be to send to a sister, Mother, daughter, any kin or friend in need of 100 hugs when she has been diagnosed with cancer.
Thank you, Thank you, Thank you for this wonderful how to! Love the idea of 3 from a jelly roll too!!
A hundred hugs coming on back to ya for sharing this with the world!
I love this quilt…gonna have to try it for sure! I also have a tip for the “eaten corners” problem. I just use a small piece of scrap fabric to start my chain piecing. That way you start to sew like normal and then start adding your pieces to the chain like you would usually. Works like a charm on mine every time. Just thought I would mention it. Thanks for the tutorial. I know a Mom that may be getting a whole lot of hugs this Christmas.
Hi, this is Kathy (with Kathy’s version posted today…) I finished quilting my adorable Hundred Hugs quilt and blogged about it today. The picture isn’t as cute as the top hanging on the line, but it’s at http://new2quilting.blogspot.com/2012/09/hundred-hugs-quilt-finished.html
You can post it if you’d like. Also, congrats on being one of the featured patterns on FAVEQUILTS website today! It was a nice little surprise when I opened up my e-mail to see a familiar “face”. Happy quilting!
This is perfect! I’m part of The Curious Quilter’s PSQ swap and this lends itself to using all of those fantastic little gems. Of course, this will mean I have to live to be 150 years old in order to make all the projects I have lined up, but hey what the heck.
I have a couple of kids who are having their children “someday”. I think I will make some of these to be ready.
Marie Miller [Australia] Thanks for all your lovely quilt patterns, I have a new baby great grandaughter so i’m going to make it for her.
Great tutorial!! I loved how you put your colors together – so cheerful & fun. Thanks for sharing this!
I wish the patterns were downloadable so I can save them until I am ready to make. Cute quilt!
You can use the PRINT or PRINT FRIENDLY option at the end of each tutorial to make a copy and save until you are ready to use.
I started quilting in July and am totally hooked. I have completed five double bed size and am on my sixth! This website is simply super I will return to it for more wonderful ideas. This is such a great tutorial and so easy to follow. Thank you. Happy quilting!
I just love these quilts that are so quick to make. I hope to make several over the winter to have on hand or donate to compassionate ministries. A smaller version would make a cute doll cradle blanket for my granddaughter as well.
I don’t understand the triangle part about cutting the 2 1/2 triangle and sewing them together and then sewing them to the border can end up to 2 inches because sewing the 2 triangles together take 1/4 inches and each side is 1/4 so that is 3/4 inch off the 2 1/2 inch sq so it want match up to the 2 inch sq in the border. I am confused about it.
I got a bit confused when you were talking about cutting the triangles into 21/2 inch each too. I am thinking you are telling me to cut the charm pack in half?
i have my first grandbaby due in october and want to make this quilt. (as we are in alaska and they are in georgia), but none of your pictures are showing up, they are all ‘unavailable’. can you please fix this so that the pattern will be easier to follow? i love the ones that you made they are beautiful. hopefully i will be able to make one that looks nice, as i have only made one other quilt before.
Love these!
I have before me the instructions etc for the hundred hugs but I have no idea how to send it to you
I have it under in my favourites
https://weddingdressblue.wordpress.com/2012/04/20/tutorial-hundred-hugs-quilt/
Don’t know if that will help though Hope so!
Googled upon this post, looking for entry-level baby quilts (I just finished my very first quilt top this morning), and I can’t wait to try it! Can’t beat the clarity of the instructions – the sewing novice over here really appreciates it 🙂
This is a great quilt. If you think it’s too small, you can always make it with larger squares, such as 3 1/2″ or even 4″ squares instead of 2 1/2″ squares.
Just finished my 100 hugs quilt made from Moda storytime jelly roll, there’s a photo of it here http://thecraftycreek.wordpress.com/2014/12/06/100-hugs/ Thanks for the great instructions 🙂
Just finished mine for my nephew and his wife. She is a big Green Bay Packer fan as my husband was so I incorporated Packer fabric. My husband passed a year and a half ago and they are naming the baby after him. This baby has already been embraced and she is not due until late April so Hundred Hugs seemed appropriate. You have some wonderful posts! Thanks so much!!!!
I’m making this pattern for the maternity where my son was born. It will be given to an abandoned baby. Thanks for this wonderful design!
Can’t wait to try this gorgeous guilt, I’m a beginner and I’m so excited to find this tutorial to help me, Bless you for sharing.
I love, love, love your 100 Hugs quilt. I have been making a few for charity. In fact I love all of your quilts. I am also making the Calico Rose QAL…although mine is a quilt alone since I came to the party too late. Will you be doing another QAL? Oh please.
I love the A Hundred Hugs Baby Quilt and would like to make it but I am unable to print off the tutorial can you please help me.
Eve Harrison
I just finished this over the weekend and it was my first quilt ever, I’m not sure how to send you the pictures, but the finished quilt is at http://www.engiknitting.com/blog/2016/3/31/my-first-finished-quilt Thank you for posting this, your instructions were so clear and easy to follow, I finished this in less than a week.
I’m a longtime quilter, but still totally love looking at new patterns and new interpretations of classic ones.
I particularly LOVE how thorough your tutorials are, how you highlight others’ examples/interpretations of a piece, and especially how simple you make it to download pdf’s of them!!
I regularly enjoy re-reading and browse my d/l’ed paterns, yours now have an important place in my collection.
Thank you.
My tip for avoiding the tip getting chewed up is to use a scrap of fabric as a leader. Even a 2″ square, folded in half (for 2 layers) is a good starter. You can sew it 1/2″ in and scoot your real patch right up next to it in the chain.