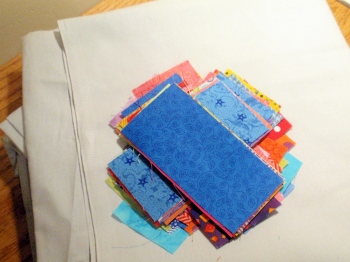
Grab a charm pack or the never-ending bag of scraps and create this simple, but serviceable, baby quilt. I decided to try a tinted background instead of my perennial white. The light grey is from Made in America fabrics, and I really like it. The color is not too light and not too dark, and the fabric cut and ironed easily.
Enjoy making your own version of Stutter Steps.
STUTTER STEPS QUILT
32″ x 36″
MATERIALS
A charm pack OR scraps–some at least 2-1/2 ” wide and 5″ long. I picked all BRIGHTS!
3/4 yard background (here light grey)
1-1/8 yard backing
batting at least 40″ x 40″
1/3 yard binding
CUTTING DIRECTIONS
1. If using a charm pack, pick 28 of your favorites and cut them each in half, creating two rectangles 2-1/2″ x 5″. If using scraps, cut 56 rectangles 2-1/2″ x 5″.
2. From your background fabric cut the following: 2 2″x 36-1/2″, 2 2-1/2″x 36-1/2″, 2 3″x 36-1/2″, 2 3-1/2″ x 36-1/2″. You should have eight strips in all.
CONSTRUCTION
1. Sort the colored rectangles into 7 piles of eight each. Stitch along the short side, joining them into long strips of 8 rectangles each.
2. Lay out the quilt, starting with a 2″ background strip. Alternate the background and colored sections. You should have a 2″ strips, colored strip, 2-1/2″ strip, colored strip, 3″ strip, colored strip, 3-1/2″ strip, colored strip, 3-1/2″ strip, colored strip, 3″ strip, colored strip, 2-1/2″ strip, colored strip, 2″ strip. Eight background pieces and 7 colored strips.
3. Stitch together. I like to sew each time from opposite ends to help keep the final quilt square.
4. Layer, quilt and bind as desired. I used stitching in the background pieces 1/4″ from the seam.
5. Ta-dah! You have completed a Stutter Steps quilt.
6. In retrospect, I would alter this pattern to make it a little larger. By adding an additional 8 charms (16 rectangles) and 2 background strips 1-1/2″ x 36-1/2″, you would have a better size quilt. If I complete a quilt with these changes I will update the tutorial. In the meantime, here is a small baby quilt. Enjoy!
STUTTER STEPS GALLERY
Mary’s pastel version. Nice layout!
Martha made one, too.

…your beautiful creation HERE!


There’s a baby shower on Jan. 2. I wasn’t going to make a quilt, but maybe I can finish this one. We’ll see how my blocks go today that I have to finish. This is how you will reach 52!
I have lots of 2.5″ strips that needs to become quilts. Thanks for sharing.
A very cheerful , cute pattern!!
You are a Temptress. I have been working with this exact size pieces (2 1/2″ x 5″) on Sunday. Only I was sewing a white rectangle to mine. I am making a coin quilt. They were left over pieces from my 2 quilts I made over the Xmas 4 day break. I need to get out more rectangles from my bin to finish off the coin quilt so I will see if I can fit this one in. I will heed your suggestion and make it a little larger. I have another 4 day break from work and am looking forward to more sewing time.
I have a shower to go to on Jan. 10 and this is perfect…I am getting out my ‘baby’ scrap bin this morning and cutting the rectangles and I will check and see what ‘background’ fabric I have..i think it will be white on white..but it is darling and it shouldn’t take too long to make…something I could actually finish by then…thanks for the great tutorial…
I might have to make this into a memory quilt, using some of my father-in-laws shirts and pants for my in-laws, I can easily cut rectangles out of those and either buy background fabric or use the jeans.
Thank you for the fabulous tutorial! I’m fairly new to quilting, but was easily able to complete a quilt top based on your instructions. I’ve posted here, if you’d like to have a look: https://www.instagram.com/p/BQ0Hs5DgJpO/