
It is called Halfway because it started with a pizza box full of half-square triangles.
HALFWAY QUILT BLOCK
The secret is that there is only ONE set of cutting directions, but you can lay it out FOUR different ways. Of course, you can just do it one way for the entire quilt. There is nothing wrong with that. If you use more variations you will get more movement in the final quilt.
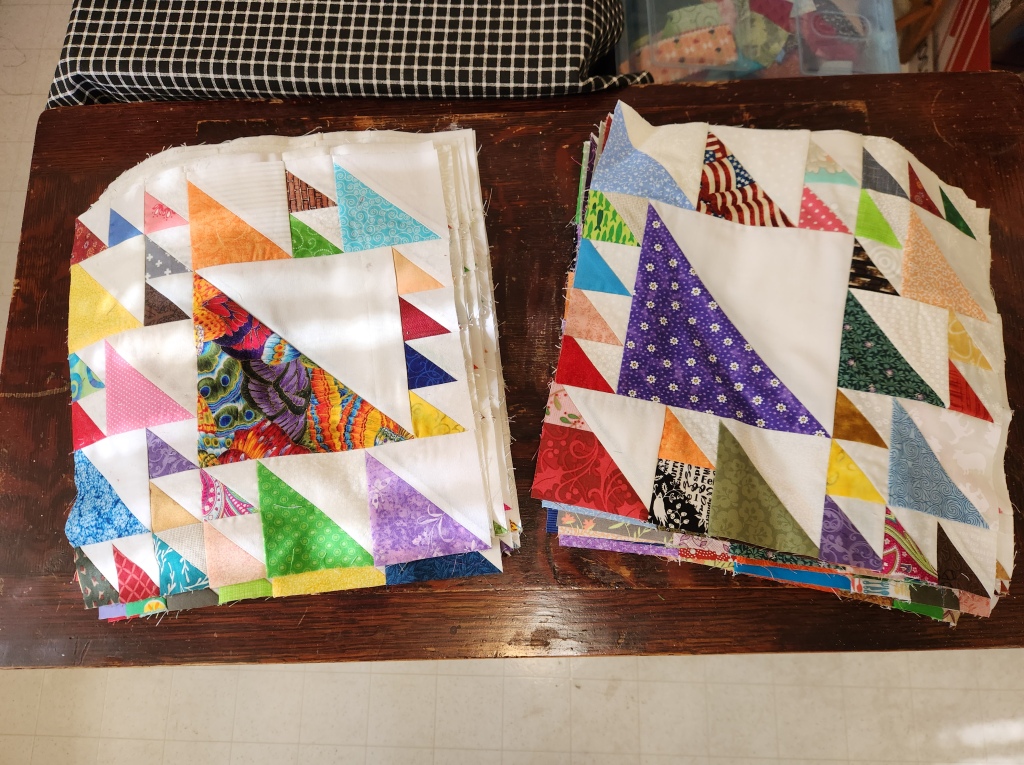
Here you can see the difference between FOUR variations on the left and TWO layouts on the right. It is up to you! Just get to work on those leftover half square triangles (HSTs), or create more for the occasion.

12-1/2″ Block
CUTTING
Each block requires the following: 1 6-1/2″ half square triangle, 7 3-1/2″ half square triangles, 20 2″ half square triangles. It works best if there is good contrast between the two sides.
ASSEMBLY

Now we get to the tricky-to-explain part. This is my original idea sketch. As you will see, I made myself notes: “cut the same, position differently”; “dark at the bottom, light on top” and “get four blocks by rotation 90 degrees each time.”
NOTE: The blocks pictured above are Variation 1 on the LEFT and Variation 2 on the RIGHT.
If you follow those directions (and ask questions when they do not make sense) you will get the blocks you expect. The image below will show how I assembled the blocks by creating sub-assemblies. The same groupings will work no matter which version of the block you are creating.
NOTE: You may want to print out the sketch so as to be able to physically turn it with the number of the desired variation at the bottom of the page when you are working to help you keep it straight.

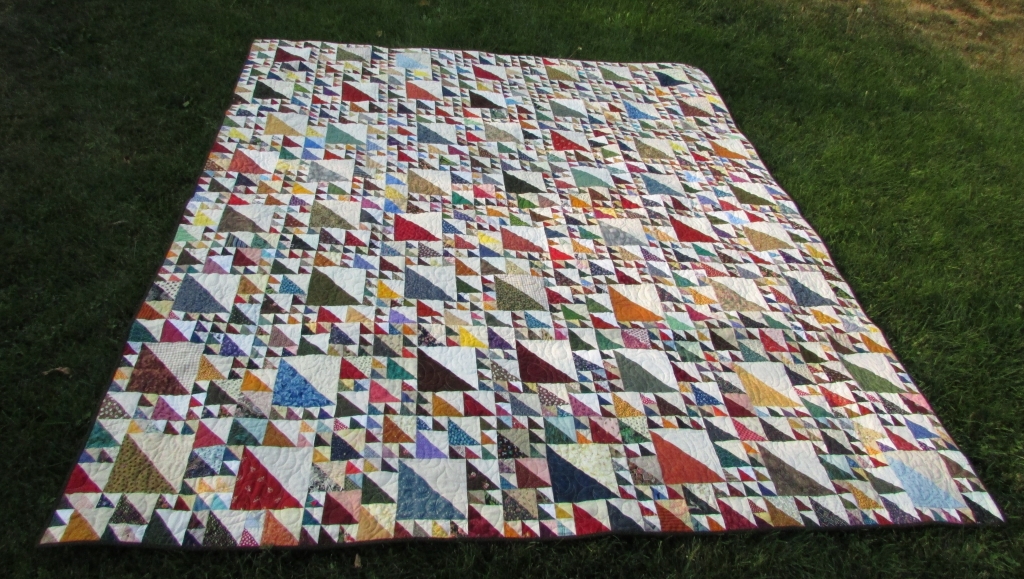
Ta-dah! Before you know it, you will have blocks. I used 56 blocks (which seemed appropriate, as each block has 56 pieces) to create a queen-ish sized quilt 84″ x 96″.
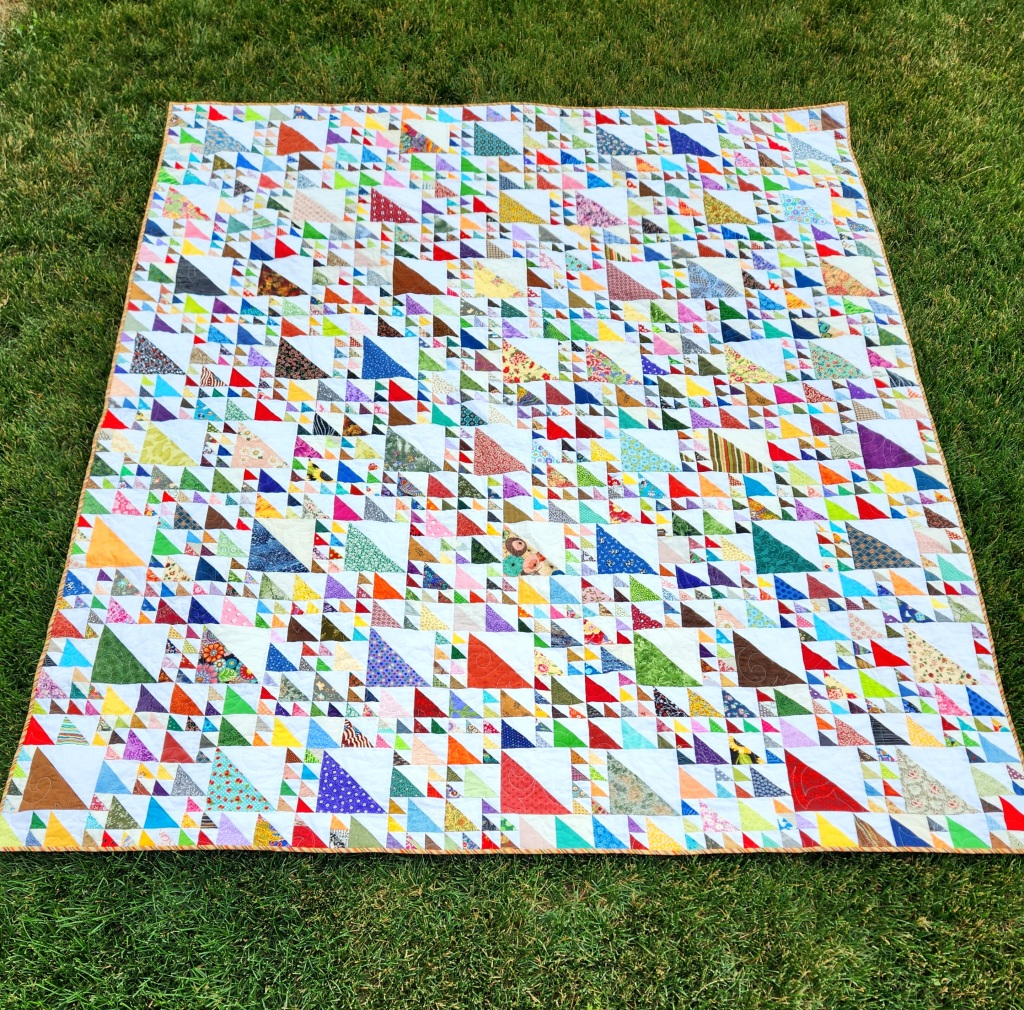
Halfway Gallery
Your beautiful creations here…

They both look lovely quilts. I have so many 1.5″ hst’s now that they are beginning to overflow my boxes (small ones thankfully) – mostly bonus from flipped corners. Add a load of incorrectly sliced ones and probably would be well short of a quarter of the way there! LOL! Thank you for another pretty to try. Almost done the Irish Stars – just a few more chain blocks to go.
Thank you for the tutorial! I just adore this quilt and know this pattern will make good use of my many scraps.
So nice to see the magic behind this quilt. I have liked all the blocks. Thank you!
Thank you so much for tutorial ! I have little baggies of triangles to use.
LUV IT!!! What a great way to use my leaders and enders HSTs!
You’re a genius!!! Thank you for sharing!